Food & Nutrition, Green Living, Health & Wellness
Get a Head Start on Summer Produce by Starting Plants Indoors
It’s easy to shop for produce in a market, but if you have a green thumb, you know the thrill of watching your own little plants grow up and produce vegetables. The anticipation of waiting for tomatoes to ripen to their full juiciness or peppers to reach their snappy freshness is one of life’s simple pleasures.
Now you can deepen the growing experience by starting seeds in your home. If you start now, they’ll be ready to transplant outside just in time for spring planting season. Here are 12 steps to grow your own produce no matter where you live.
Buying Seeds
You can buy seeds at practically any hardware store, nursery or even online. Make sure you buy the freshest seeds possible, as fewer seeds will germinate if the seeds are old. With such a huge variety available, make sure you chose ones that will eventually grow well in your area and can thrive in whatever outdoor space you have.
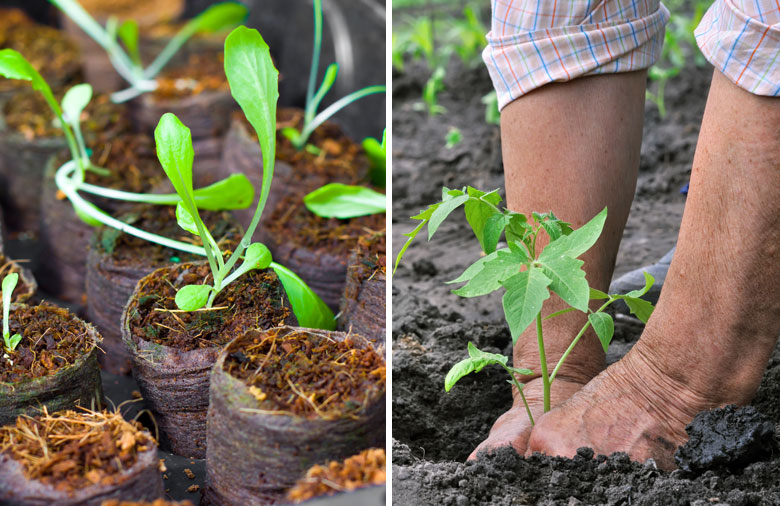
Containers
It’s best to keep germinating seeds in small containers, as their roots will entangle when growing together in a large pot. Many stores sell individually divided containers that will be easy to transplant after the seeds have sprouted. Look for ones that are made of organic materials such as peat or shredded wood so that they break down once transplanted outside.
Soil
Purchase the highest-grade seed-starting mix you can find. The better ones are actually not composed of actual ‘soil’, but are potting mix made of vermiculite and peat. These products are sterile and their texture allows for seeds to thrive faster.
Timing
You’ll want to make sure that your seeds are started at just the right time so they are the correct size when moved outside. Luckily, seed packets will state right on the package when to start inside and when to transplant outside, all depending on which growing zone you live in. Seed suppliers have made it as easy as possible to help you be successful.
Sowing Seeds
Seed producers make this part easy, as well, with very specific instructions as to how close seeds can be together, how deep and how much soil should be on top. Make sure to use a permanent marker to create name tags so you know which seeds are which. Once they start sprouting, they will all basically look the same and you won’t be able to tell them apart.
Location
Believe it or not, windowsills are not a good place to germinate the seeds. This time of year, windowsills can still be very chilly, especially at night, which can impede or even halt germination. Plus, the light coming in this time of year is often too weak and not out for as many hours as needed for successful germination. Chose an area where the seeds won’t get bumped, or experience drastic changes in light, temperature or humidity.
Light
If you are devoted to starting a large amount of seeds, you might want to invest in fluorescent lights, rather than rely on natural light. While there are special ‘grow lights’ available, just standard cool white tubes available at a hardware store will suffice. While plants need a good amount of light – 12 to 16 hours a day – make sure to give them a false ‘nighttime’ by turning out the lights or they won’t develop properly.
Heat
Besides light, seeds need a proper amount of heat to germinate. Consider buying electric heating mats specially made for starting seeds to keep both seeds and soil warm. Chilly soil can actually kill the seedlings or create an environment where pathogens can grow and terminate germination.
Watering
The potting mix needs to be moist at all times, but never saturated, which will cause the seeds to rot. To prevent seeds from getting washed out of their containers or getting drowned by regular watering cans, use an inexpensive spray bottle to gently water the surface of the potting mix.
Fertilizing
Seeds actually have a natural ‘fertilizer’ inside themselves that provide the proper nutrients, so they don’t need any type of extra fertilizer when germinating. Actually, it can be too harsh and actually burn them. You can use fertilizer once they have several sets of leaves. After they’ve reached that size, a very weak solution – about a quarter strength – will help the new plants grow stronger.
Transplanting
As plants get too large for their tiny containers, transplant them to larger peat pots, or paper or plastic cups. Make sure all containers have proper drainage. When moving the seedlings to new containers, be careful to lift them by the root ball, and not by the stem as it can snap very easily.
Testing Outdoors
Tender plants need to go through a process called ‘hardening off’ before being planted outdoors. Otherwise, full sun, wind or fluctuating temperatures can damage or kill them. For about 2 weeks before planting them permanently outdoors, give your seedlings a bit of time outside each day. This will give them time to adjust to real weather outdoors before planting them in the ground or large containers according to their planting instructions.
Once you’ve planted them outside, watch them carefully to make sure they’re receiving the correct amount of sunlight and moisture according to their growing instructions. These will fluctuate according to whichever zone you live in and the specific microclimate of your area or neighborhood.
If you found these growing instructions helpful, consider forwarding it to a friend who might be interested in growing their own produce from seed.
Sources
http://www.organicgardening.com/learn-and-grow/starting-seeds-indoors
http://containergardening.about.com/od/containergardening101/a/Seedmistakes.htm
http://www.burpee.com/vegetables/vegetable-seeds/indoor-seed-starting-article10002.html
Related Articles
Green Living: How to Start Your Indoor Herb Garden
Join the Discussion
0 Comments